When to use a Dedicated Gateway
- You have a well-defined workflow with known tool requirements
- You want precise control over which tools your agent can access
- You’re building a production agent that needs deterministic behaviour
- You want to minimise context window usage by exposing only relevant tools
Creating a Dedicated Gateway Config
From the MCP Gateways dashboard, click + Create MCP Gateway and select Dedicated MCP Gateway. The creation wizard has three stages:Stage 1: Gateway Info & Setup
Stage 1: Gateway Info & Setup
This is where you define the core of your gateway.Name and describe your gateway. Give it a meaningful name (e.g., “Sales Agent Gateway” or “Support Bot”) and an optional description so your team can easily identify it.Add MCP servers and select tools: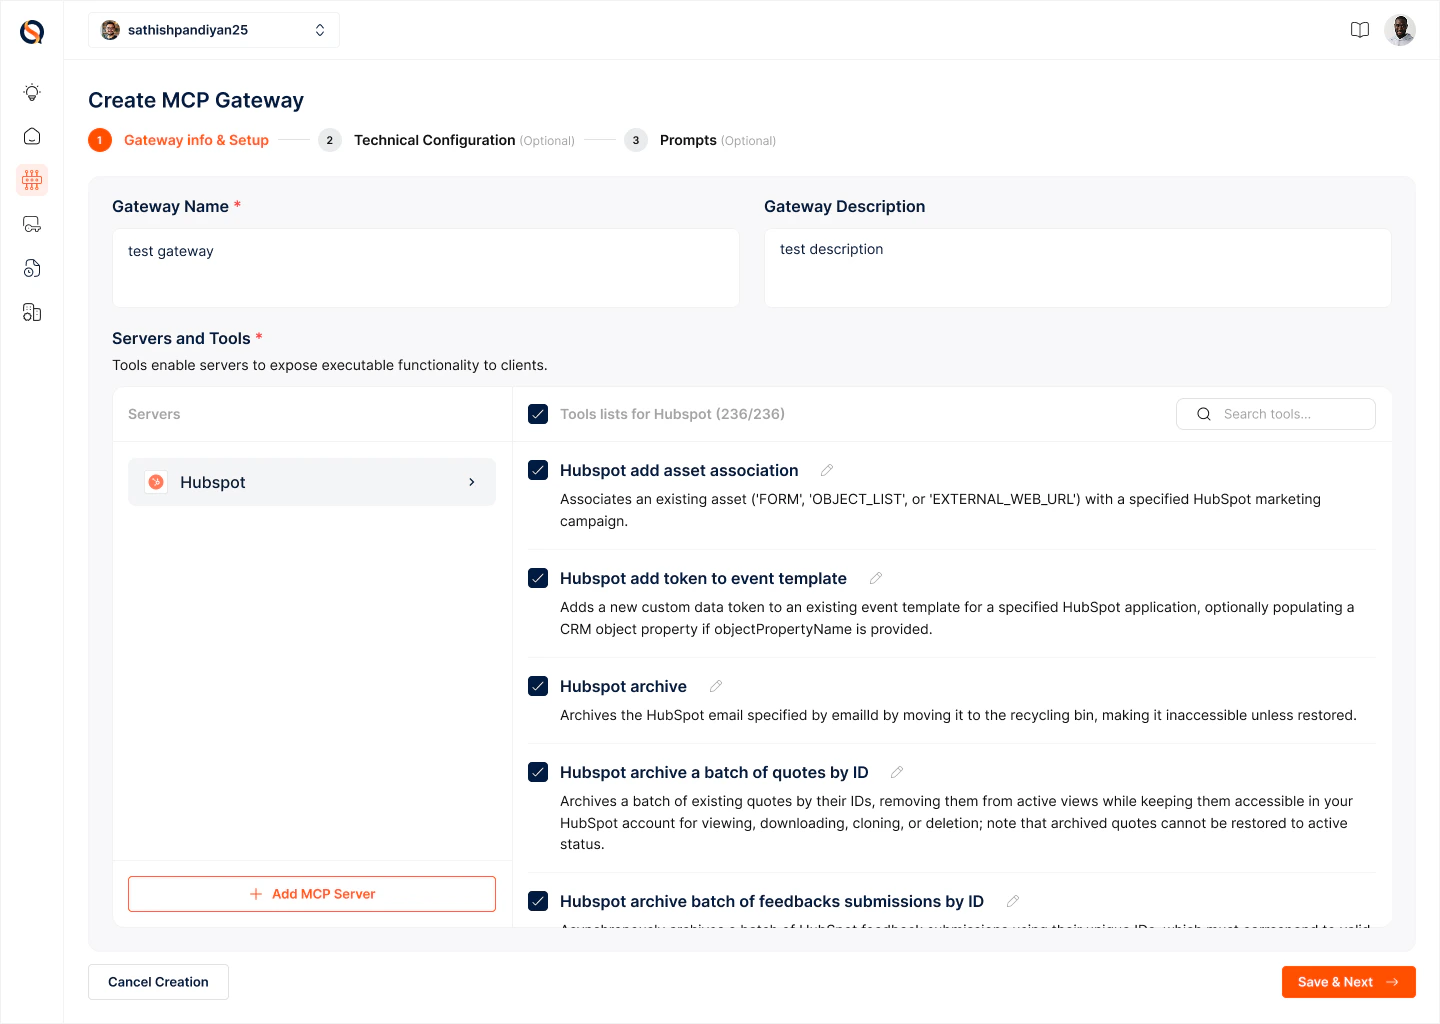
- Click + Add MCP Server to open the server selection panel
- Browse or search for the server you need (e.g., HubSpot, Gmail, Slack). Each server displays its supported authentication methods — OAuth2, API Key, etc.
- Select an Auth Config for that server. You can pick an existing one or click + Create Auth Config to create a new one inline (see Auth Configs for details)
- Once authenticated, the server’s full tool list appears with checkboxes. Select only the tools your agent needs. For example, with HubSpot you might select
HUBSPOT_CREATE_CONTACTandHUBSPOT_UPDATE_DEALwhile leaving everything else unchecked. - Click + Add MCP Server again to add more servers to the same gateway
Stage 2: Technical Configuration (optional)
Stage 2: Technical Configuration (optional)
Configure security and performance settings: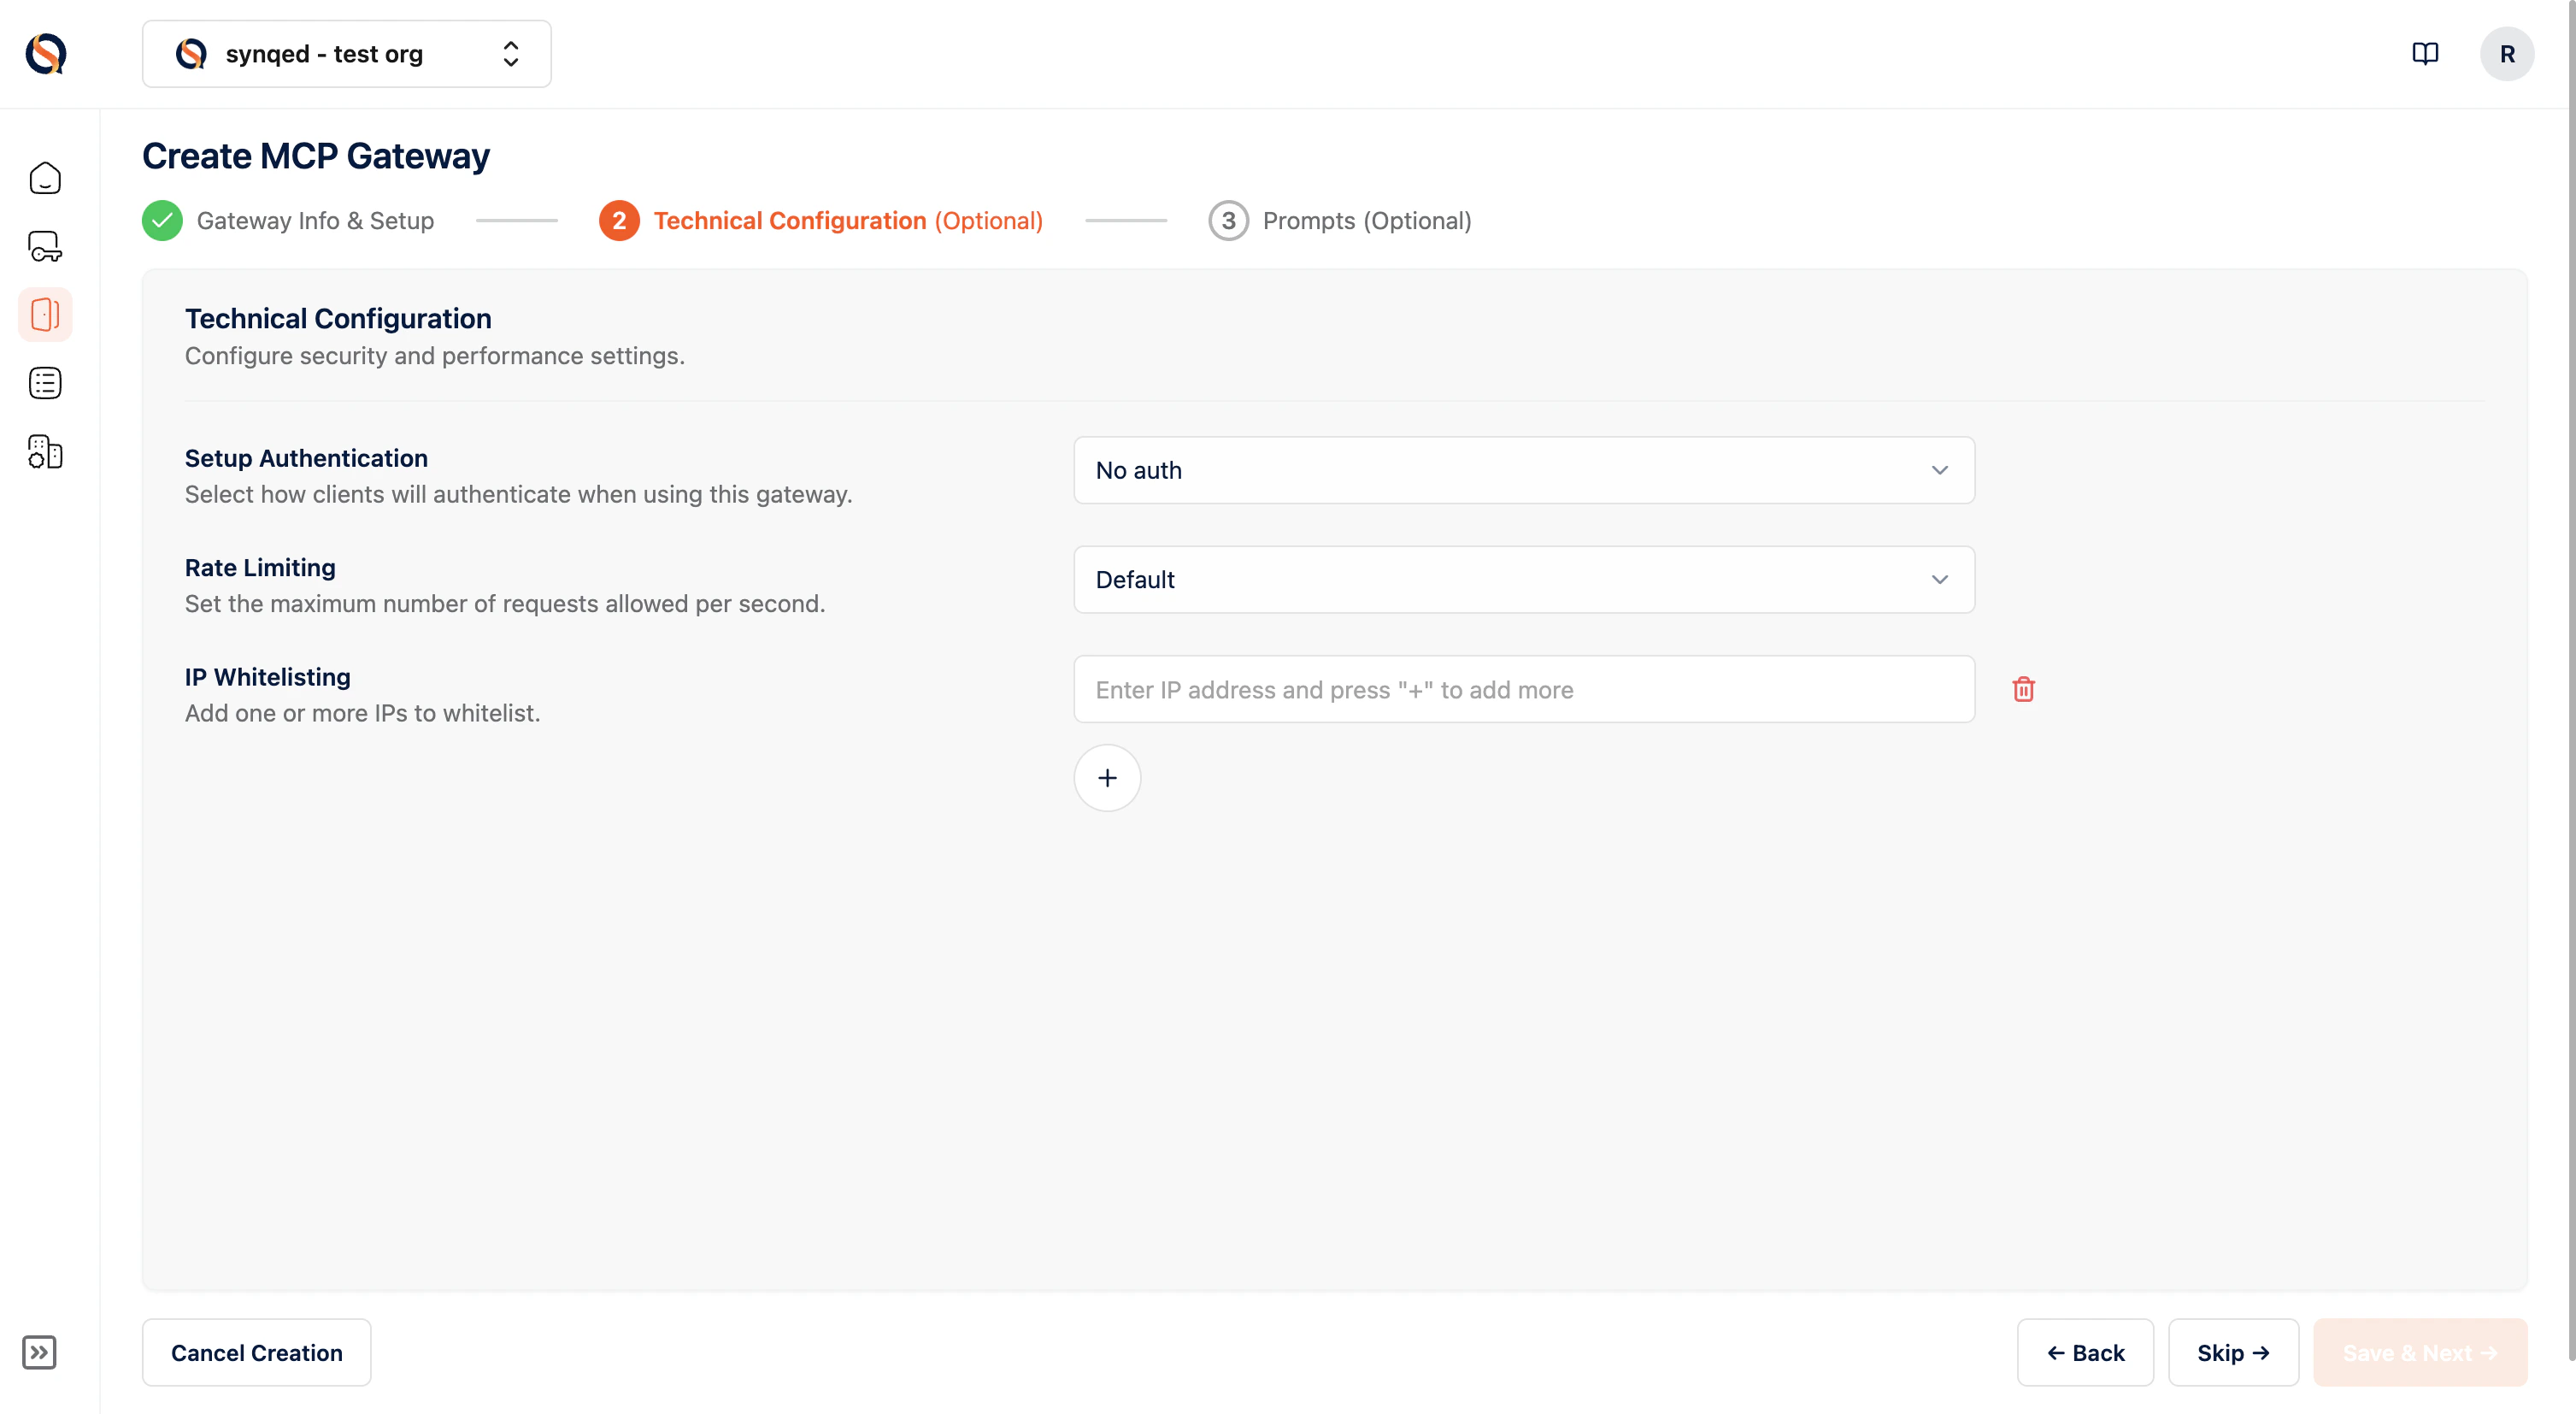
- Setup Authentication — Define how clients authenticate when connecting to this gateway. Options include No Auth, API Key, and others depending on your security requirements.
- Rate Limiting — Set the maximum number of requests allowed per second to prevent abuse and control costs.
- IP Whitelisting — Restrict gateway access to specific trusted IP addresses. Add one or more IPs to ensure only authorised networks can reach your gateway.
Stage 3: Prompts (optional)
Stage 3: Prompts (optional)
Prompts guide how the gateway orchestrates tool calls and workflows. Each prompt has three components: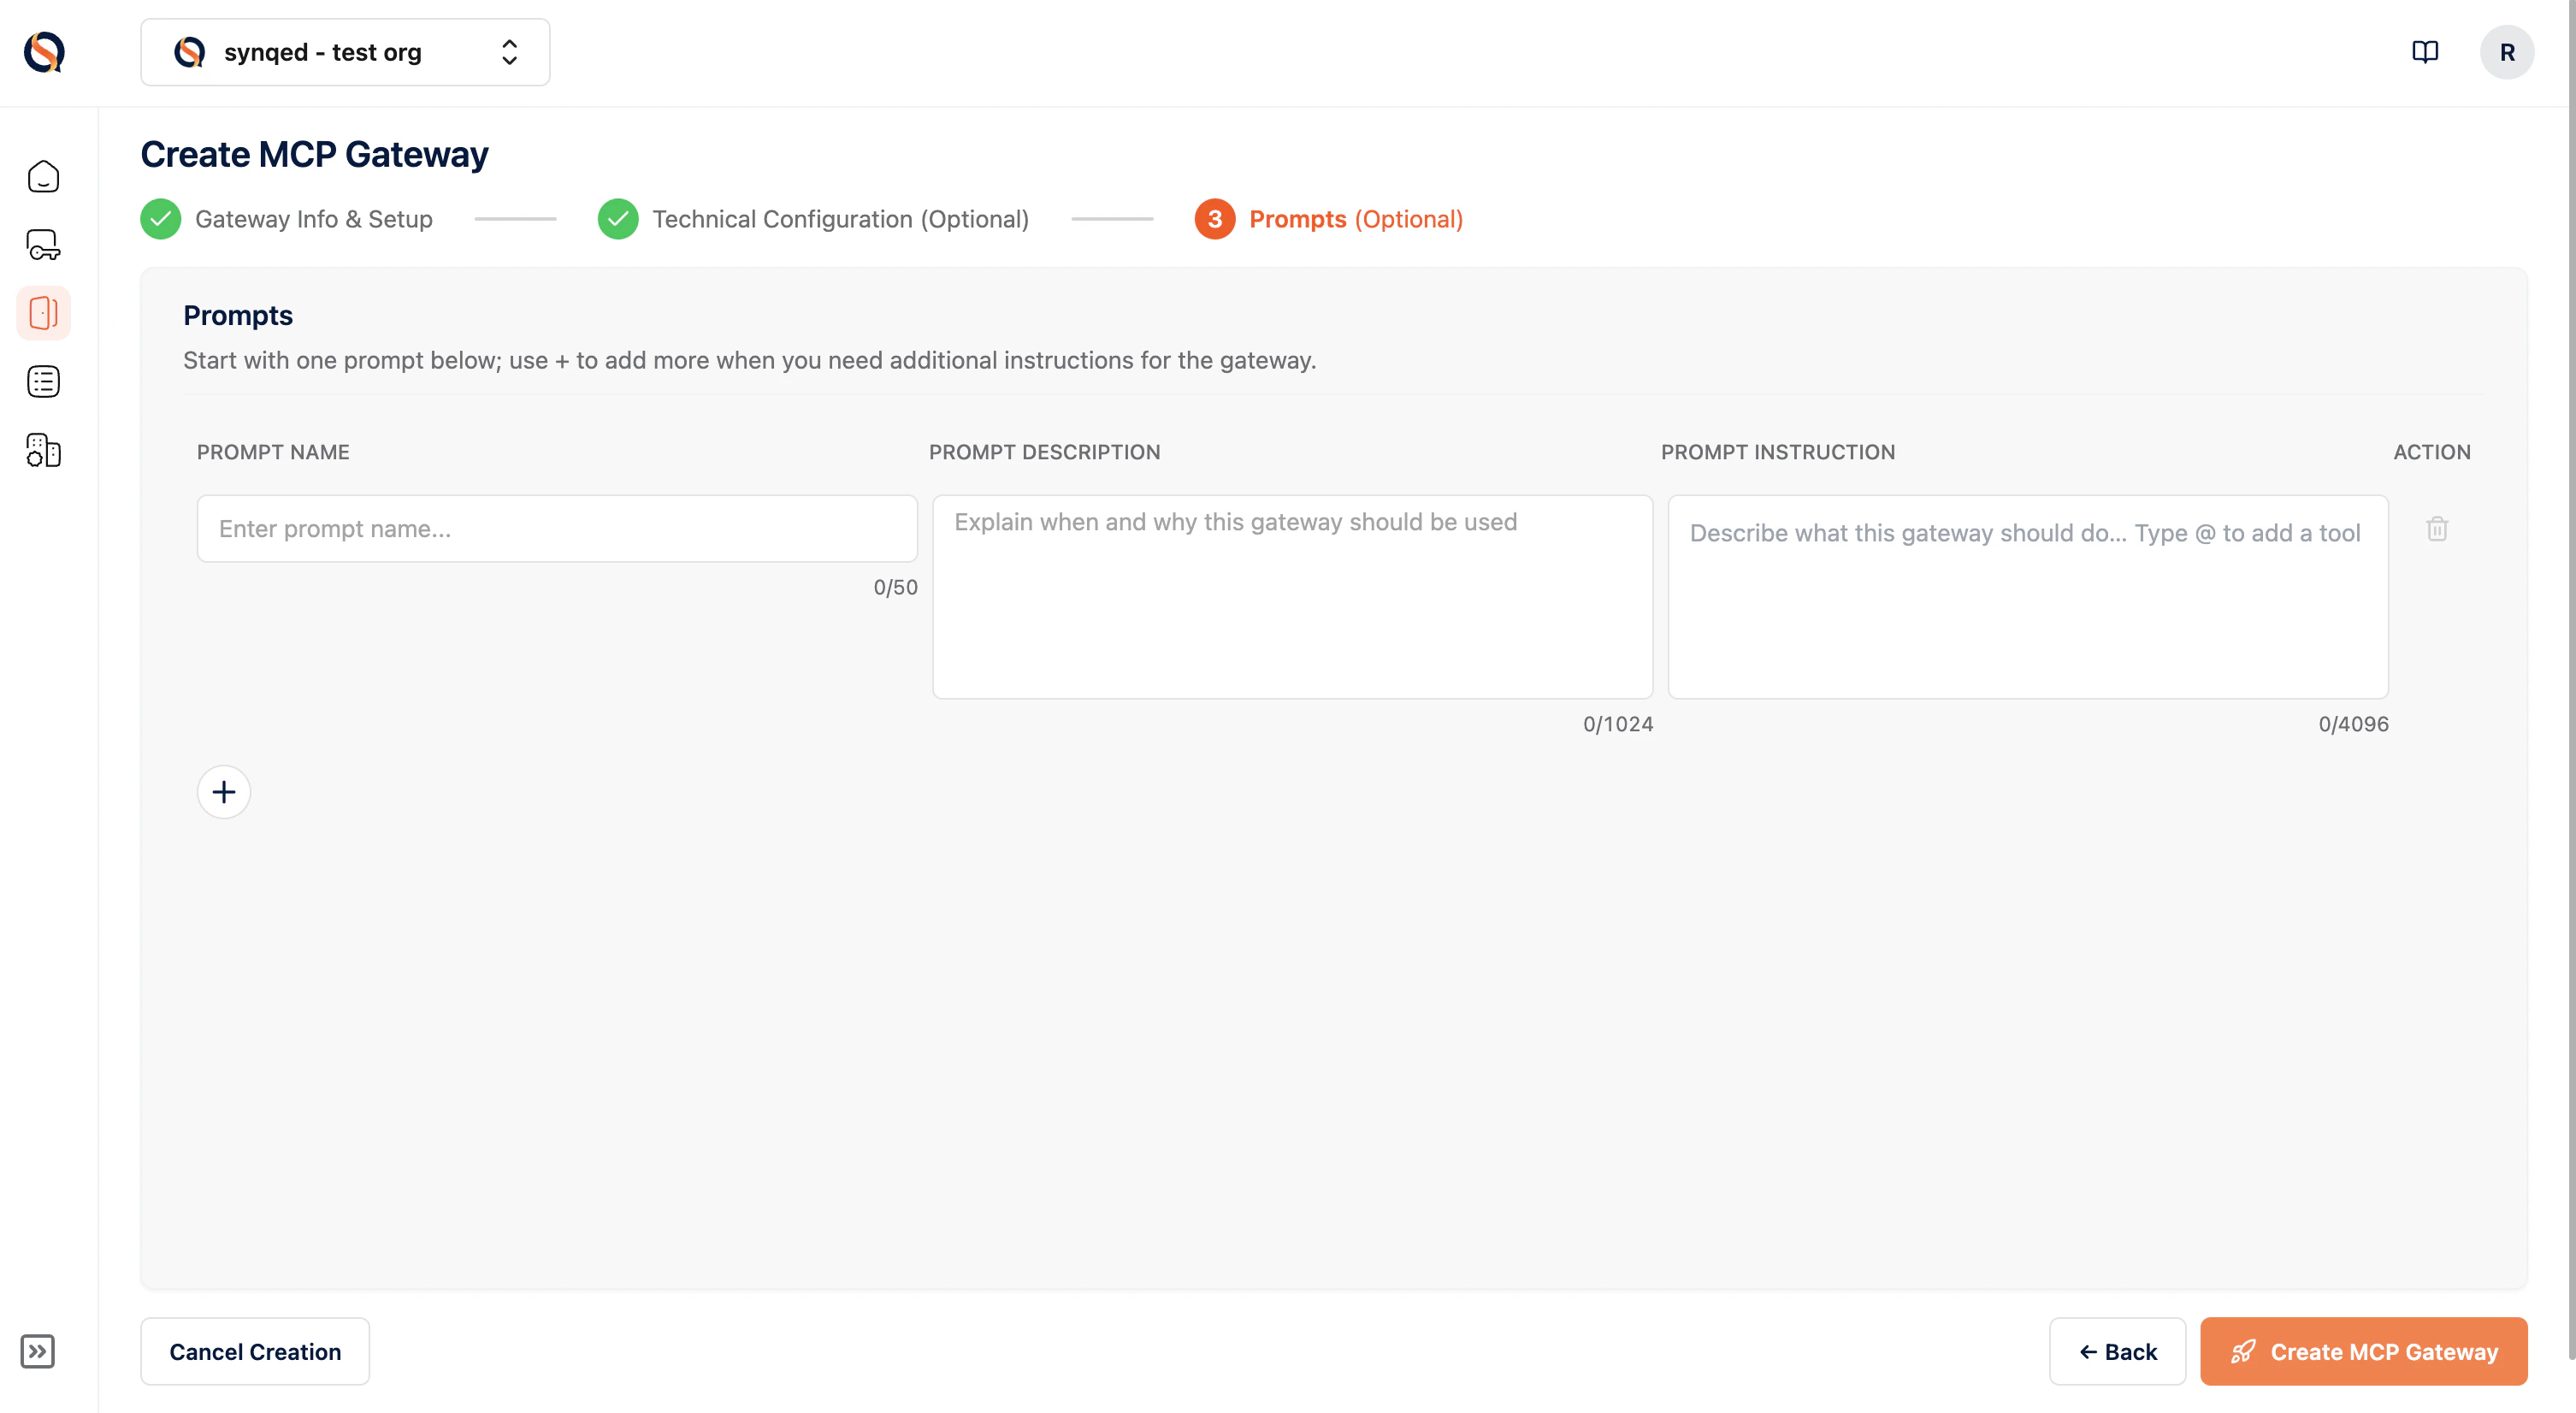
- Prompt Name — A short identifier (e.g., “Sales Workflow Orchestrator”)
- Prompt Description — Explain when and why this prompt should be used
- Prompt Instruction — Describe what the gateway should do. Use @ to reference specific tools within the instruction
Creating a Gateway Instance
Once your Gateway Config is saved, you’ll see it listed on the MCP Gateways dashboard with its name, description, server count, tool count, prompt count, and status. To make the gateway operational, create an instance from the config. Each instance generates:- A unique Gateway URL — the MCP endpoint your agent connects to
- An API key — for authenticating requests to the gateway
Best Practices
- Keep it focused — Only include the servers and tools your agent actually needs. Fewer tools means less context bloat and better tool selection by the LLM.
- Use descriptive names — Name your configs clearly (e.g., “Customer Support - Gmail + Zendesk”) so your team can find and manage them easily.
- Reuse Auth Configs — If multiple gateways need access to the same server (e.g., Gmail), reuse the same Auth Config instead of creating duplicates.
- Start with prompts — Define clear prompt instructions to guide your agent’s behaviour. A well-crafted prompt significantly improves tool selection accuracy and helps execute workflows.
- Test before production — Create a staging instance from the same config to test your agent’s behaviour before deploying to production.