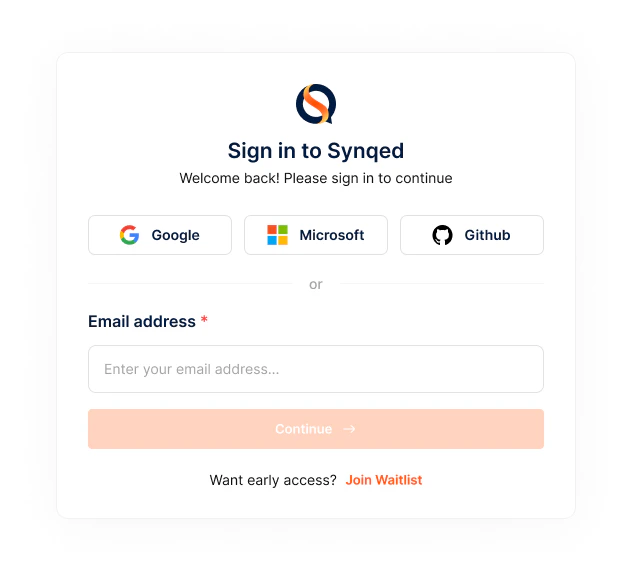
Step 1: Sign in to the platform
Head to mcp.synqed.ai and create your account. Synqed supports multiple sign-in methods to fit your enterprise’s identity infrastructure:- SSO — Sign in with Google, Microsoft, or GitHub
- Email — Use a traditional email-based login
Step 2: Create your organisation
Once signed in, you’ll land in your organisation workspace. Every user gets a default organisation automatically, but you can create additional organisations for different departments, projects, or clients. Use the organisation switcher in the top-left corner and click + Create New Organisation. Provide a name and optionally upload a logo. Each organisation maintains its own set of MCP servers, team members, and permission policies — completely isolated from one another.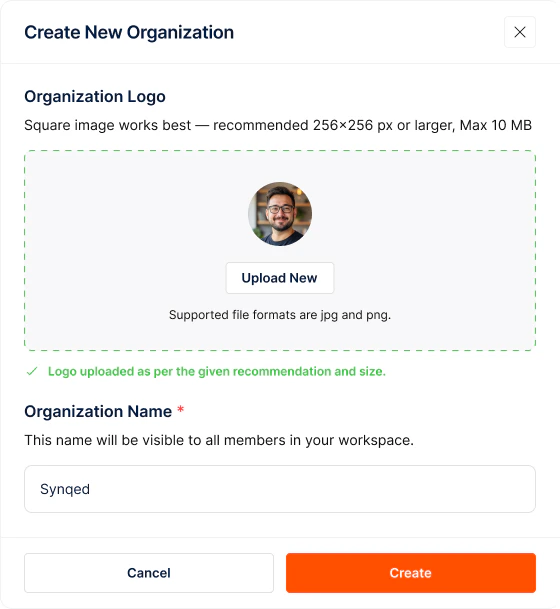
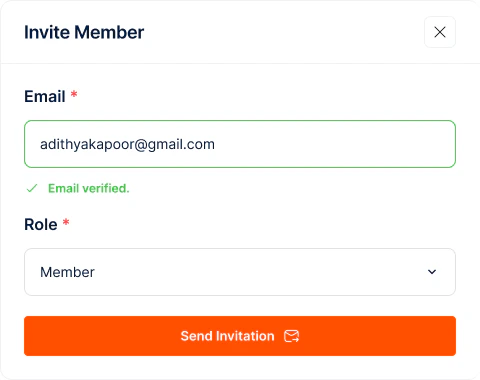
Step 3: Invite your team
Navigate to the Organization management panel to manage your team:- Click + Invite Member to add team members by email
- Assign roles — Admin or Member
Step 4: Create your first Gateway Config
A Gateway Config is a blueprint that defines which MCP servers, tools, and settings your AI agents can access.
Stage 1: Gateway Info & Setup
Stage 1: Gateway Info & Setup
Name and describe your gateway. Give it a clear name and description so your team can identify it later.Add MCP servers. Click + Add MCP Server to open the server selection panel. Browse available servers — Dynamics 365, HubSpot, PostgreSQL, and more. Each server displays its supported authentication methods (OAuth2, API Key, etc.).Select an Auth Config. After choosing a server, you’ll be prompted to select an Auth Config — a reusable authentication blueprint for that server. If one already exists (e.g., “new hubspot config”), select it. Otherwise, click + Create Auth Config to create a new one:Select tools. Once authenticated, the server’s full tool list appears. Use the checkboxes to select exactly the tools your agent needs. For example, HubSpot exposes tools like HUBSPOT_ADD_ASSET_ASSOCIATION, HUBSPOT_ARCHIVE, HUBSPOT_ADD_TOKEN_TO_EVENT_TEMPLATE, and many more.Repeat this process to add more servers — click + Add MCP Server again. All added servers appear in the left panel for easy navigation.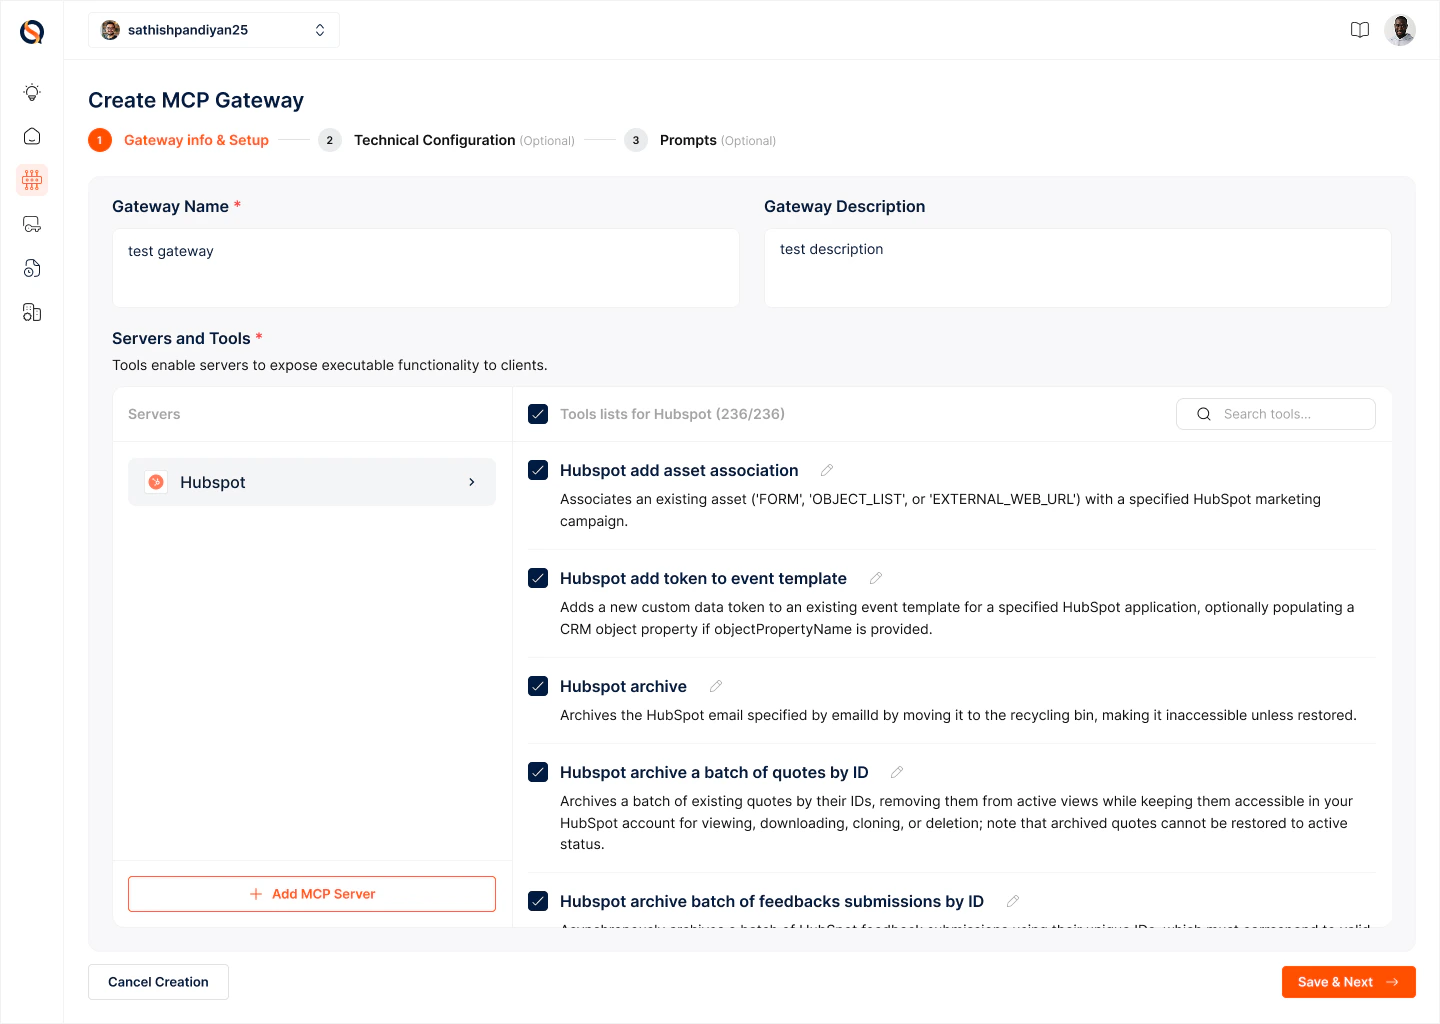
- Give it a name
- Choose the authentication method (API Key, OAuth, etc.)
- For OAuth, configure the required scopes
Auth Configs are reusable across multiple gateways within your organization, so you only need to set them up once per server.
Stage 2: Technical Configuration (optional)
Stage 2: Technical Configuration (optional)
Configure security and performance settings for your gateway: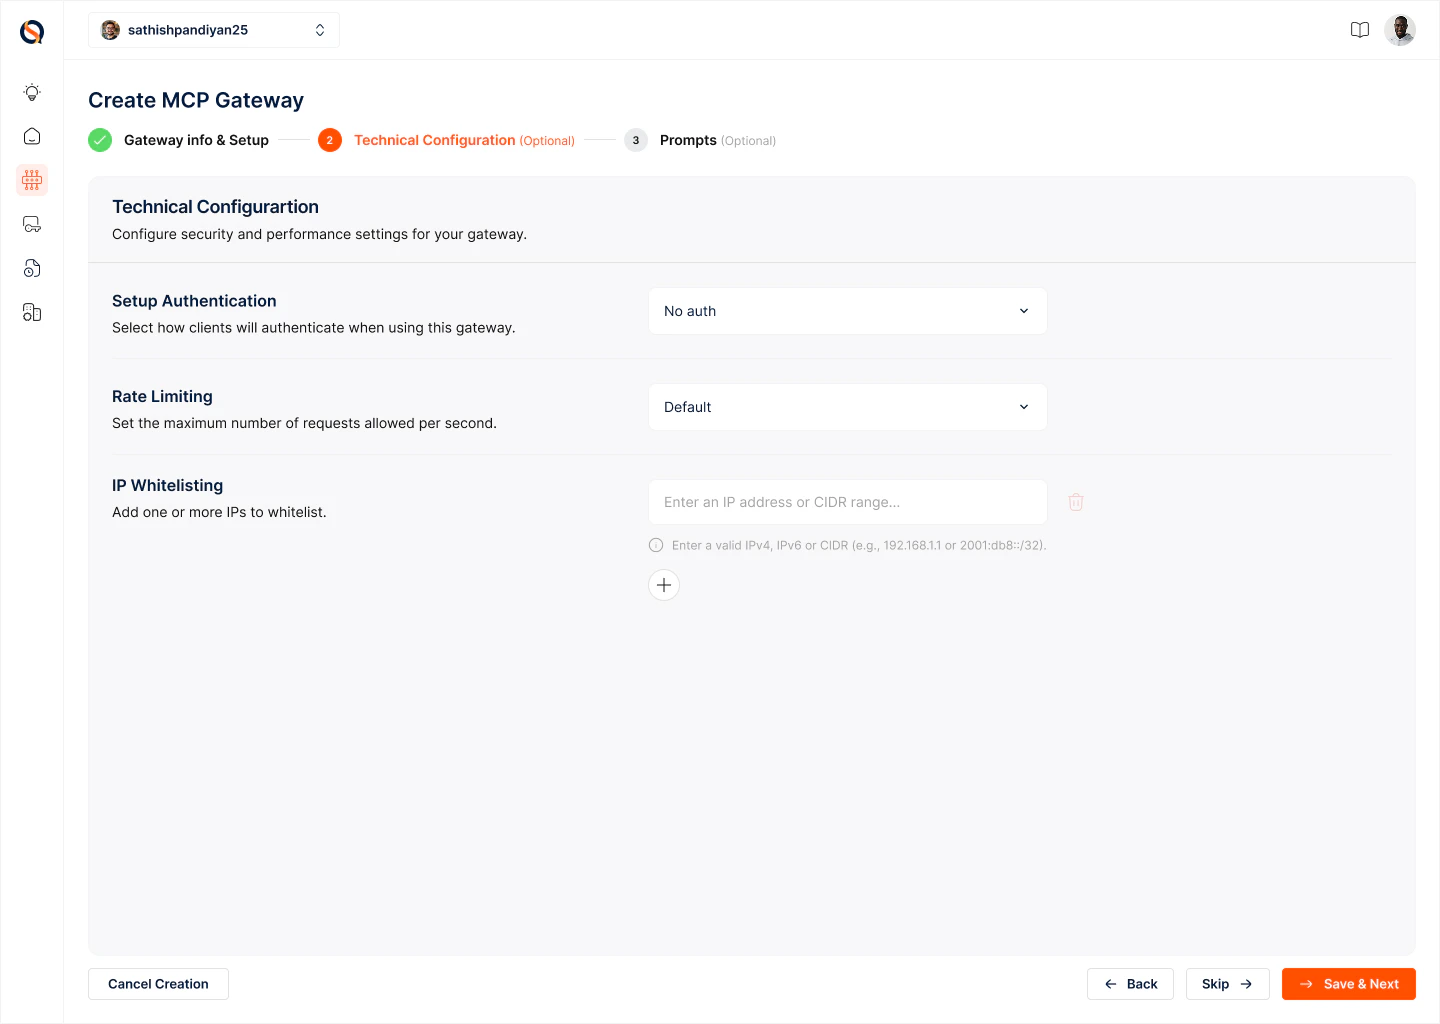
- Setup Authentication — How clients authenticate when connecting to the gateway
- Rate Limiting — Maximum requests per second
- IP Whitelisting — Restrict access to trusted networks
Stage 3: Prompts (optional)
Stage 3: Prompts (optional)
Prompts are MCP primitives that guide how the gateway orchestrates tool calls and workflows. Each prompt has a name, description, and instruction. Use the @ symbol within instructions to reference specific tools. Prompts act as reusable workflow templates — instructing the gateway on how to analyze requests, fetch data, and automate multi-step actions.Click + Create MCP Gateway to save your gateway config.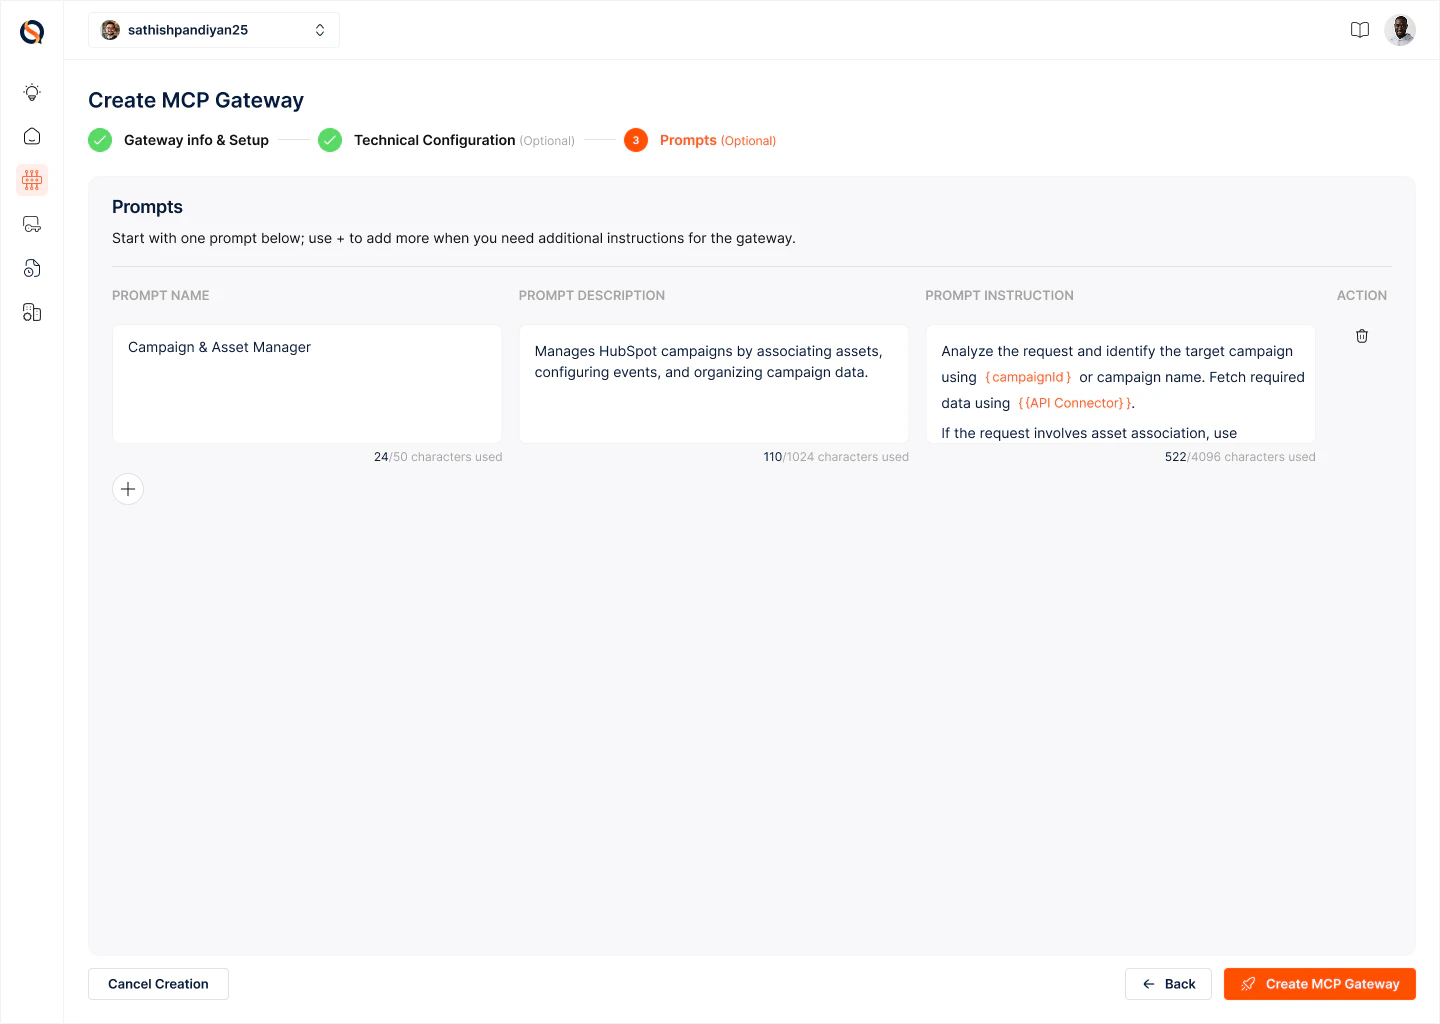
Step 5: Create a Gateway Instance
Your Gateway Config is now a saved blueprint. To make it operational, create an instance from the config. Each instance generates a unique Gateway URL and API key — everything your AI agent needs to connect. Point your agent at the Gateway URL, and it’s ready to take action across all your connected SaaS tools, securely and at scale.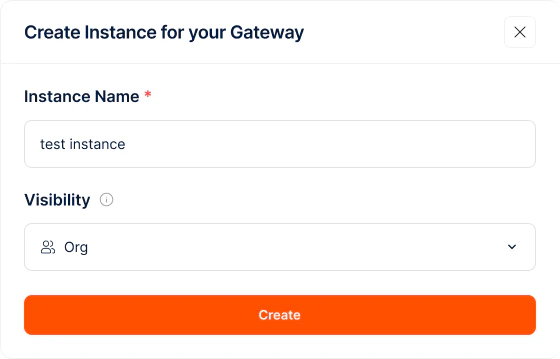
What’s next?
- Learn How Synqed MCP Gateway Works to understand the architecture
- Explore the ToolRouter for complex workflows where required tools aren’t known upfront
- Manage Auth Configs centrally for your organization
- Connect user Accounts to your auth configs
How Synqed MCP Gateway works
Understand the concept behind gateways
Toolrouter
Expose all your tools without overloading context