Where to find it
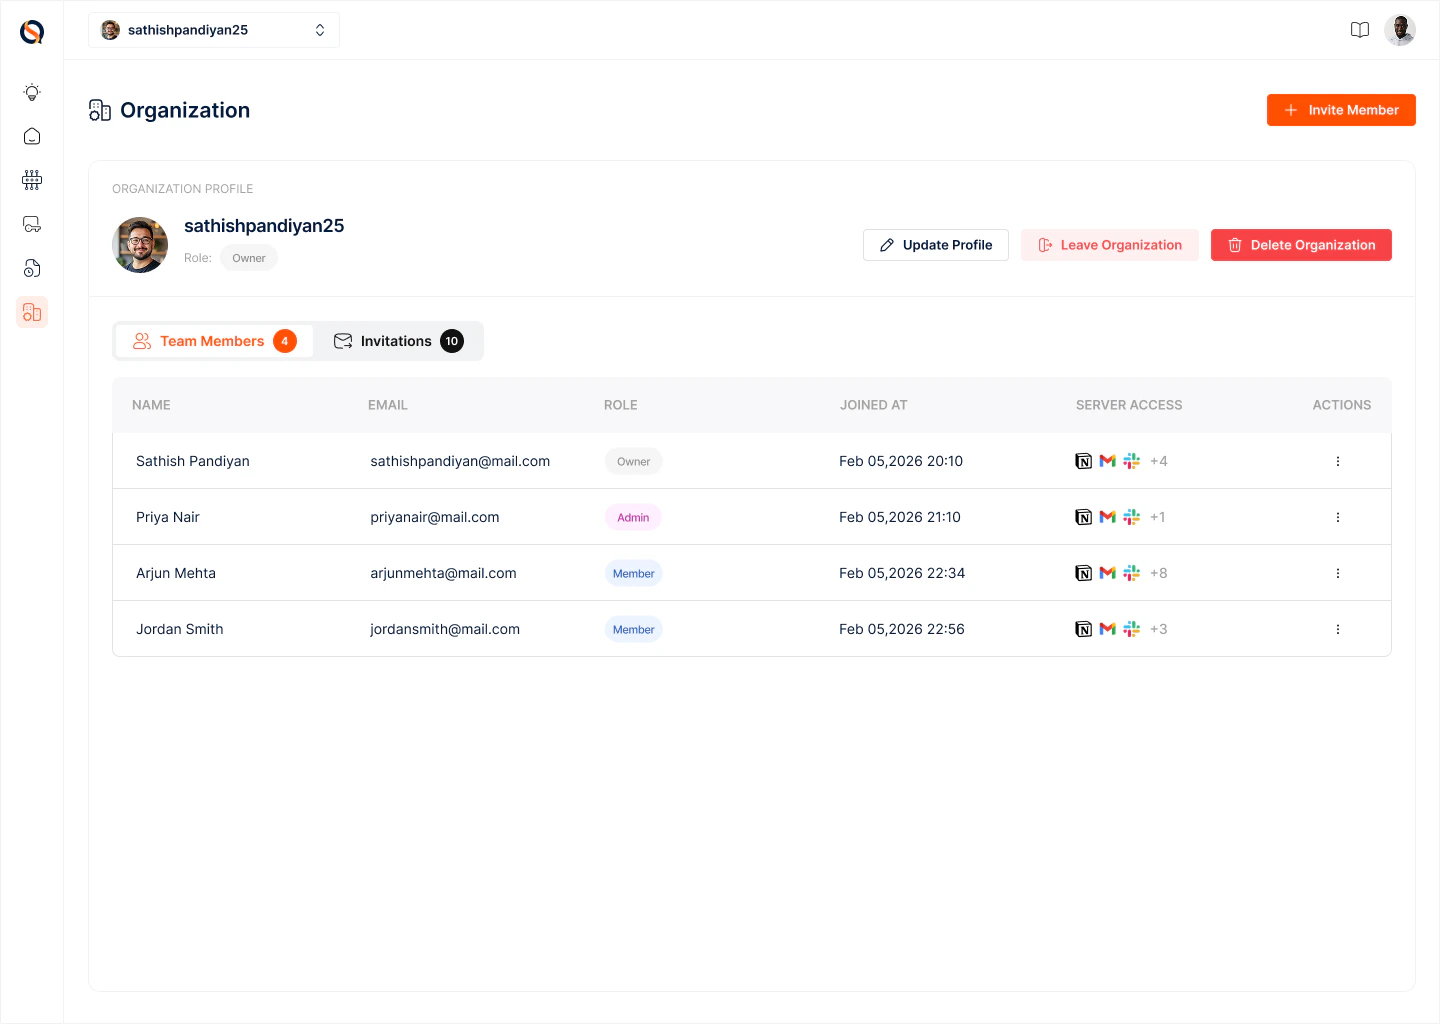
Open the organisation switcher in the top-left of the app and click Manage on the active organisation (or navigate to Organisation from the sidebar). You’ll land on the Organisation page.Organisation Profile
At the top you’ll see the Organisation Profile block with:- Organisation logo and name (e.g., “Synqed — Test org”)
- Your role badge (Owner, Admin, or Member)
- Update Profile — edit the organisation name and logo
- Leave Organisation — remove yourself from this organisation (subject to role rules)
- Delete Organisation — permanently delete the organisation and everything inside it (Owner only; use with care — this revokes every Connection and tears down every gateway)
Inviting members
Click + Invite Member (top right) to send an invitation. You’ll provide the invitee’s email and pick a role. They’ll receive an email with a link to join. Pending invitations appear in the Invitations tab with a count badge, so it’s easy to see who hasn’t accepted yet.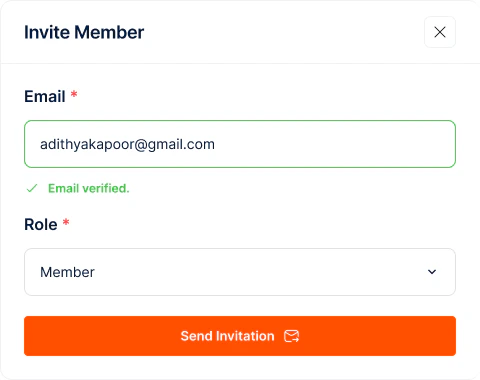
Team Members
The Team Members tab lists everyone in the organisation with these columns:- Name
- Role — Owner, Admin, or Member
- Joined On — the date they became part of the organisation
- Actions — a kebab menu for per-member actions (change role, remove member, resend invite, etc.)
Roles and permissions
Synqed uses three roles with a clear hierarchy:- Owner — full control over the organisation, including deleting it. There can be multiple owners, but at least one owner must exist at all times.
- Admin — can manage members, invite new users, change roles (below Owner), and manage all gateways, Auth Configs, and Connections.
- Member — can build and operate within the permissions granted, including creating their own Auth Configs, gateways, and Connections based on the scopes they need.
Invitations tab
The Invitations tab shows all pending invites — including the invited email, the role they were invited to, and the timestamp. From here you can:- Resend an invitation if the email was lost
- Cancel an invitation you no longer need
Best practices
- Keep at least two Owners so the organisation isn’t locked out if one leaves.
- Use Admin sparingly — most team members only need Member access.
- Review the Team Members list periodically and remove anyone who no longer needs access.
- Clear out stale pending invitations so your Invitations tab reflects reality.