When to use the ToolRouter
ToolRouter is best suited for general-purpose agents whose required tools aren’t known upfront, exploratory workflows where the agent may need different tools per query, large tool catalogs where loading every schema would bloat the context window, and rapid prototyping — attach a server and the ToolRouter figures out the rest. If you already know exactly which tools your agent needs and want deterministic exposure, a Dedicated Gateway is a better fit.How the ToolRouter exposes tools
Instead of exposing every tool directly, the ToolRouter exposes five meta-tools to your agent. This keeps the context lean while giving access to the full catalog on demand:- search — Discover tools by intent across all connected servers
- get_tool_schema — Fetch the full input/output schema of a specific tool on demand
- manage_auth — Authenticate tools and manage OAuth flows at runtime
- tool_execution — Execute a tool with the correct input parameters and injected credentials
- remote_workbench — A Python workbench for orchestrating multiple tools and handling large results
Creating a ToolRouter Config
From the MCP Gateways dashboard, click ”+ Create MCP Gateway”, then select “Using Tool Router MCP”. The creation wizard has three stages — similar to a Dedicated Gateway, but with a simpler first stage.Stage 1: Gateway Info & Setup
Stage 1: Gateway Info & Setup
Name and describe your gateway (e.g., “General Agent — Prod”). Then select the MCP servers you want available to the ToolRouter — Gmail, Slack, GitHub, Notion, Google Sheets, Google Drive, Jira, Outlook, and more. You can flip “All servers” on to include every available server in one click, or toggle individually.That’s it for tool selection. You don’t pick individual tools — the ToolRouter handles correct tool exposure automatically at runtime based on the agent’s query.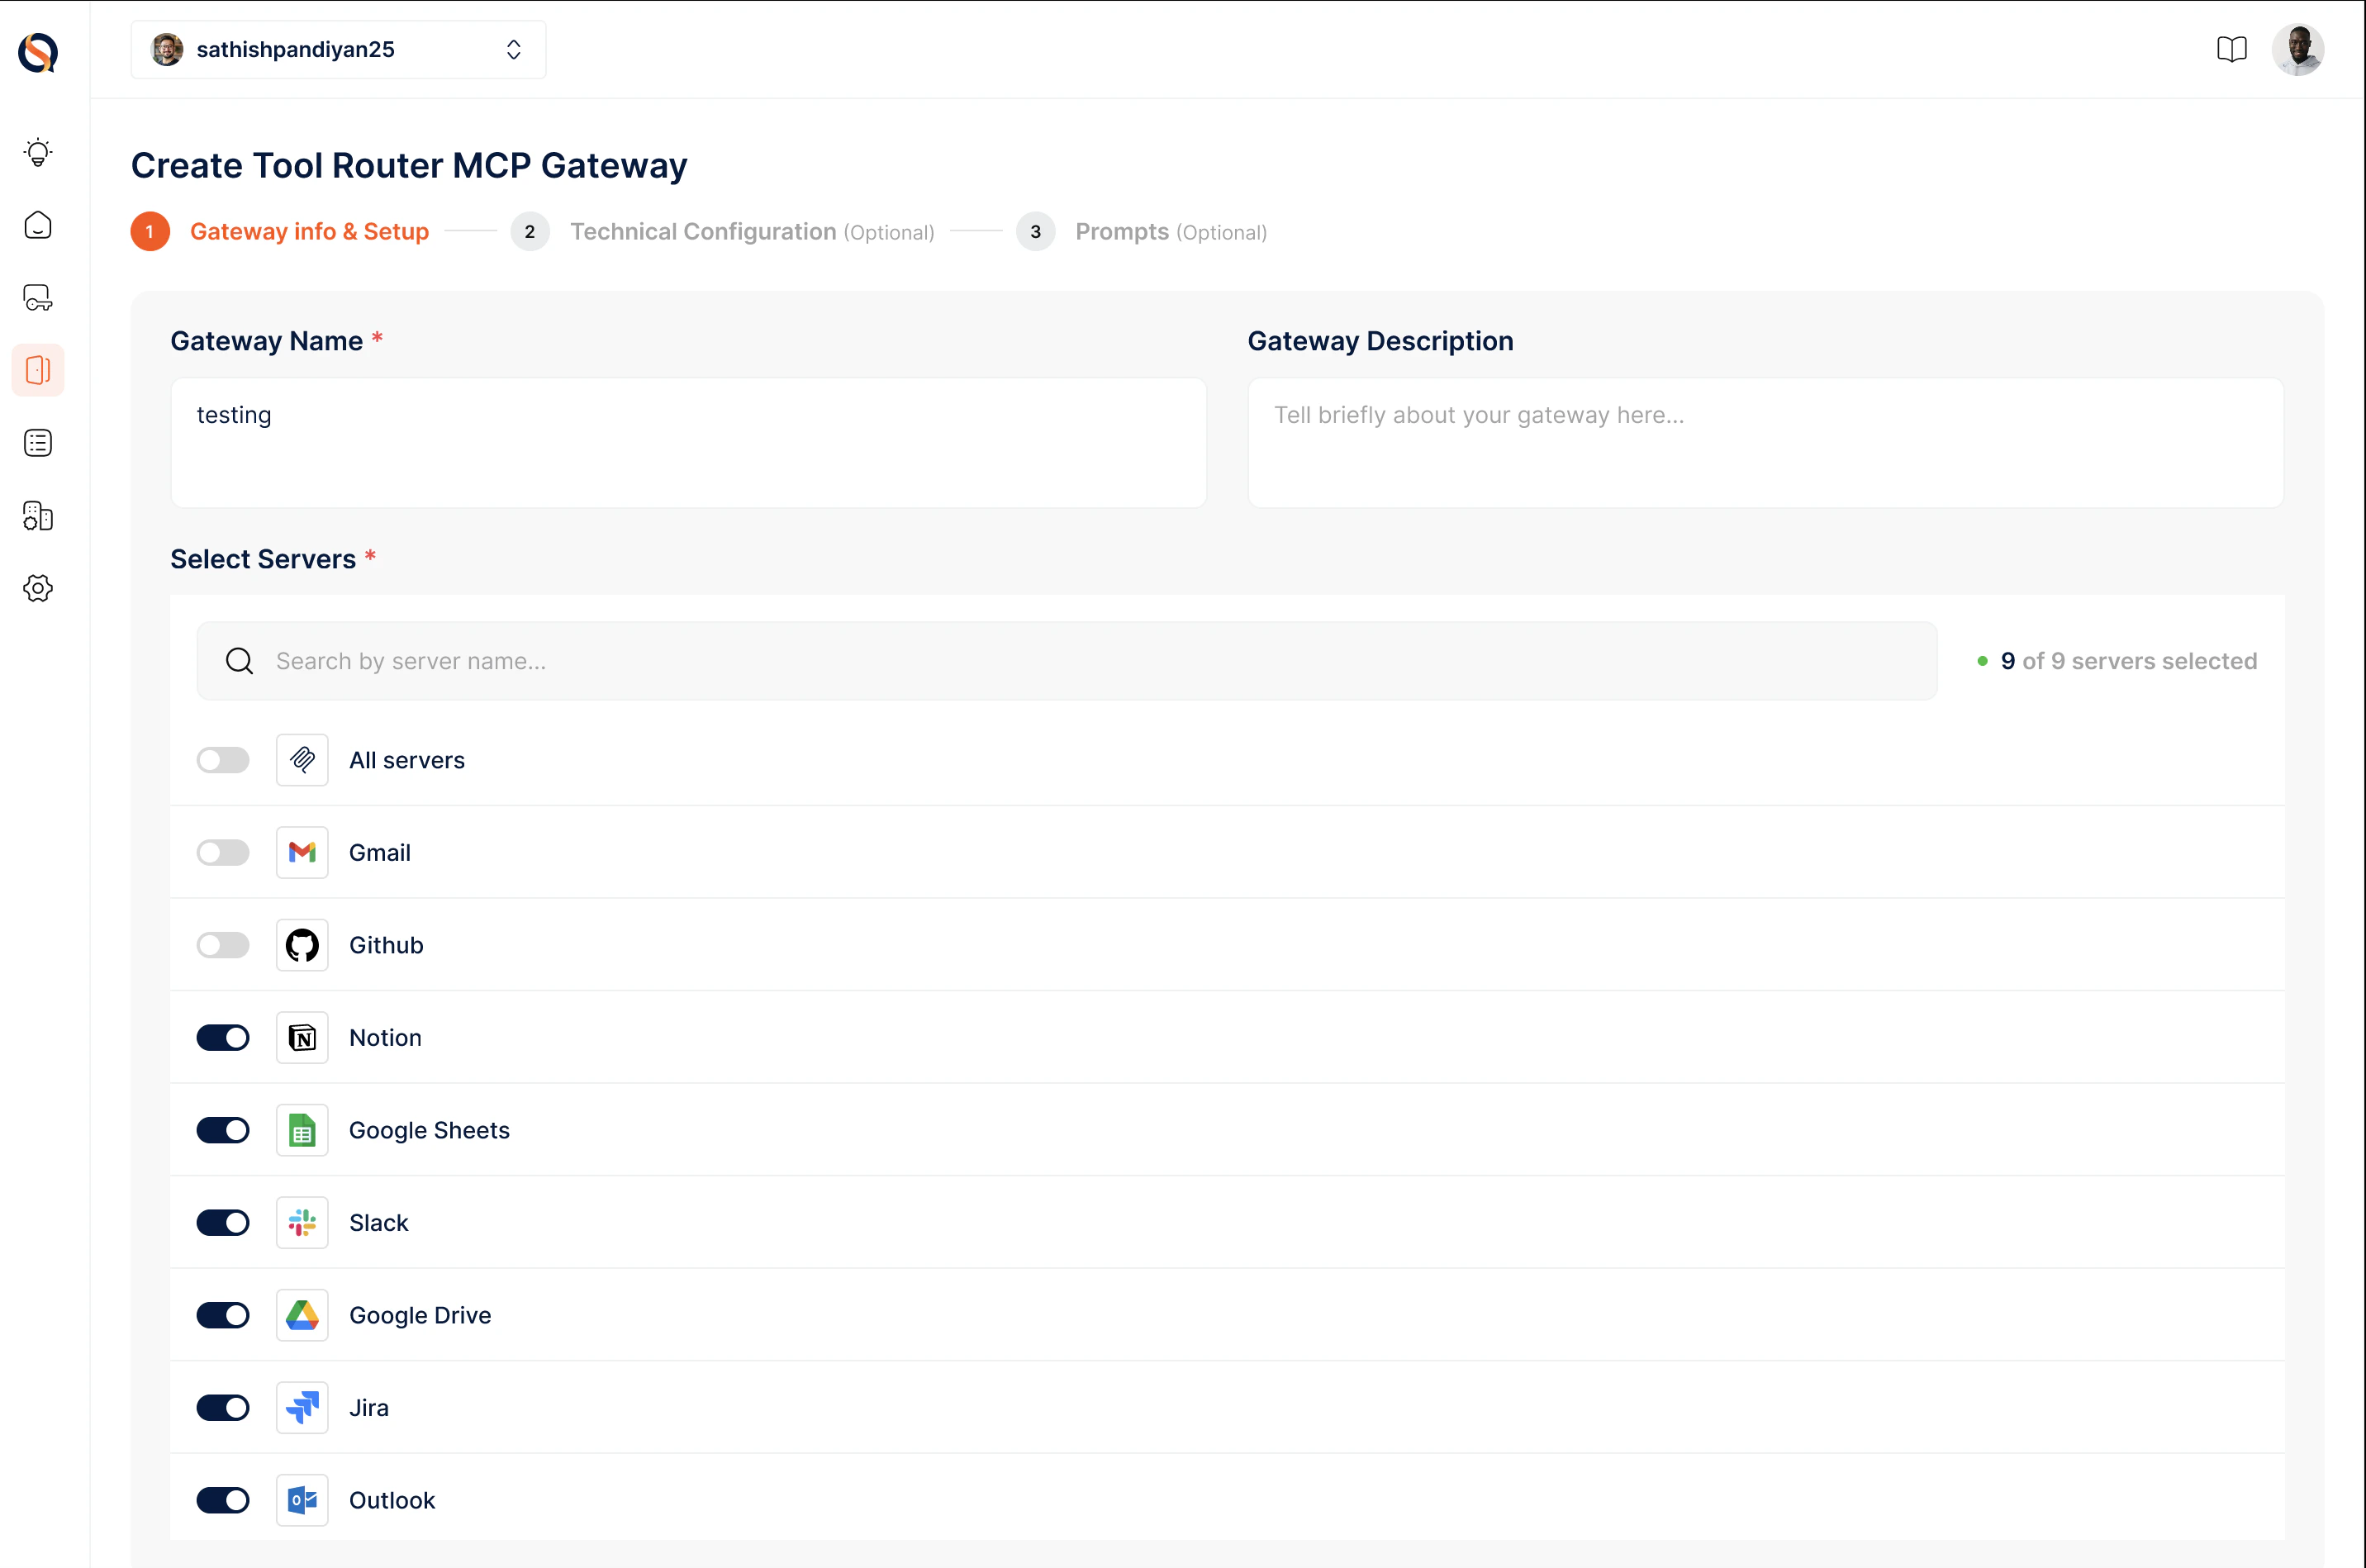
Stage 2: Technical Configuration (optional)
Stage 2: Technical Configuration (optional)
Configure security, performance, and tool-safety settings: Setup Authentication (how clients authenticate when connecting to the gateway), Rate Limiting (max requests per second), Session timing (how long a session stays active — preset 8 hrs / 12 hrs / 24 hrs, corresponding to the VM session of the ToolRouter), and IP Whitelisting.The Technical Configuration stage also includes tool-safety toggles — fine-grained controls over which categories of tools the ToolRouter is allowed to surface: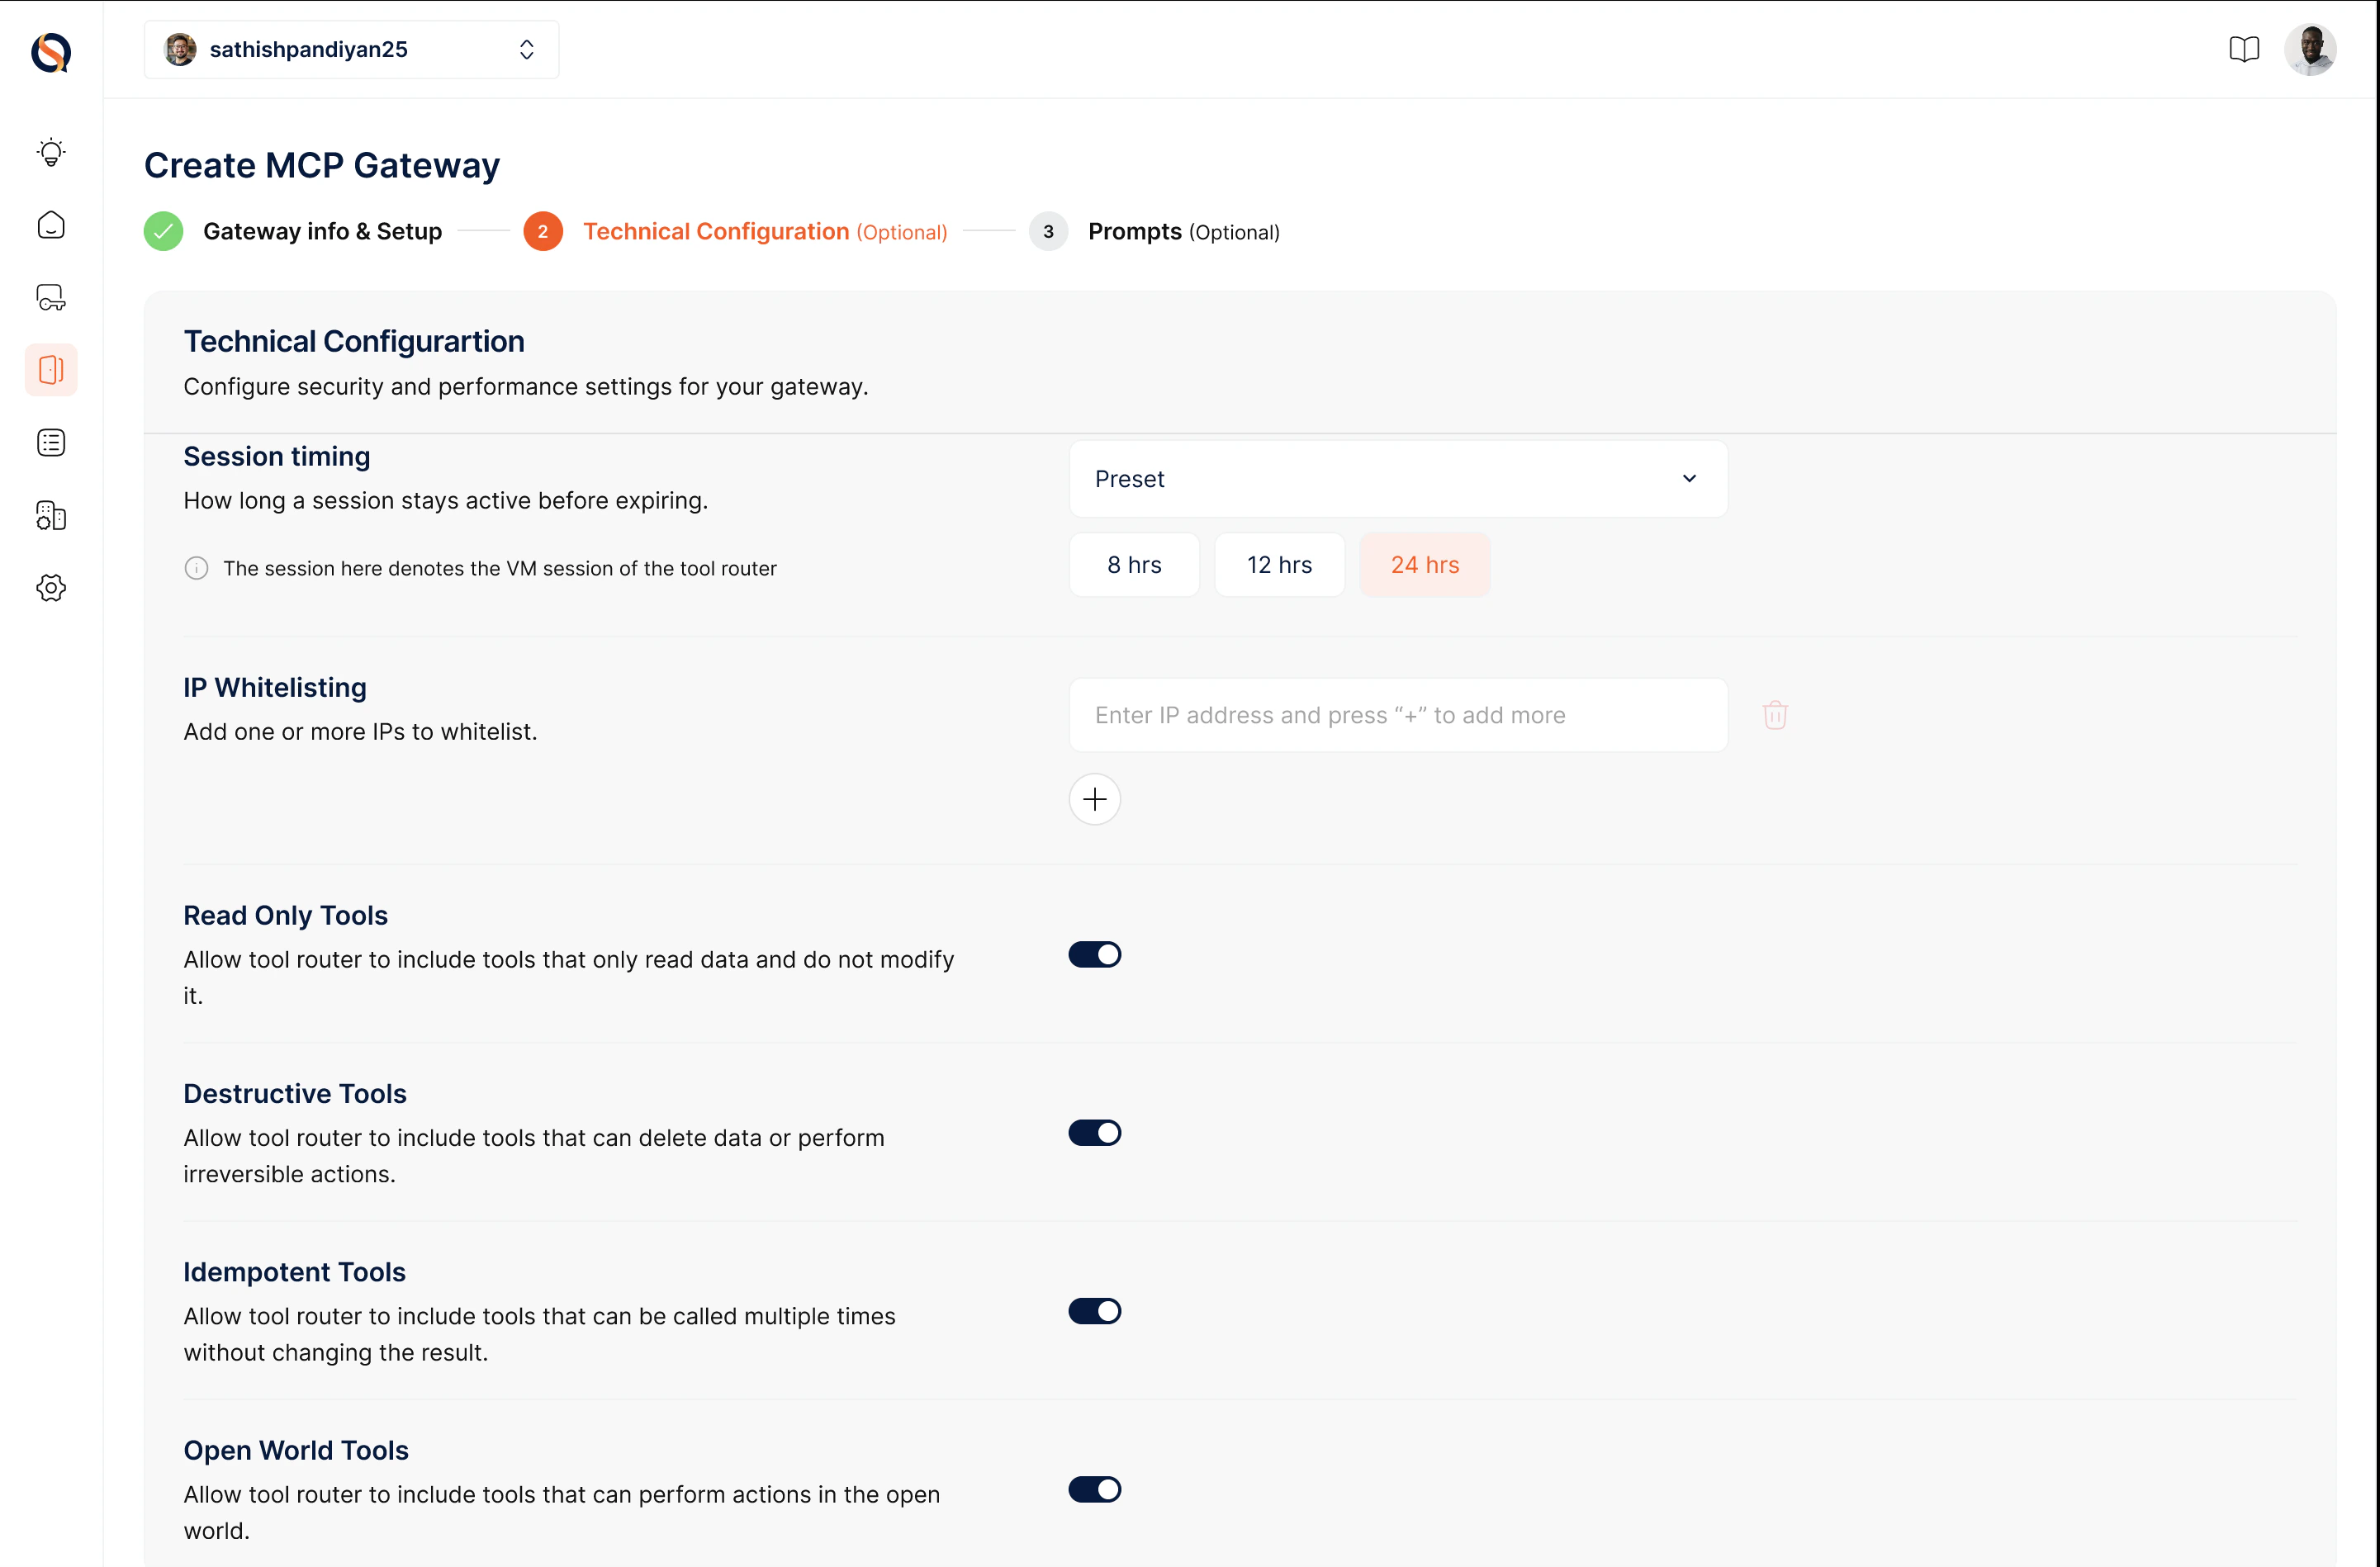
- Read Only Tools — Tools that only read data and don’t modify anything
- Destructive Tools — Tools that can delete data or perform irreversible actions
- Idempotent Tools — Tools that can be called multiple times without changing the result
- Open World Tools — Tools that can perform actions in the open world (external calls)
Stage 3: Prompts (optional)
Stage 3: Prompts (optional)
Prompts guide the ToolRouter in orchestrating workflows across the servers you’ve connected. Each prompt has three fields: Prompt Name, Prompt Description, and Prompt Instruction — use the @ symbol to reference specific tools.For example, an “Agentic Workflow Designer” prompt might instruct the router to analyze a request, fetch data via @API_Connector, and automate actions with @Automation_Tool, logging into @Database.Click “Create MCP Gateway” to save your ToolRouter Config.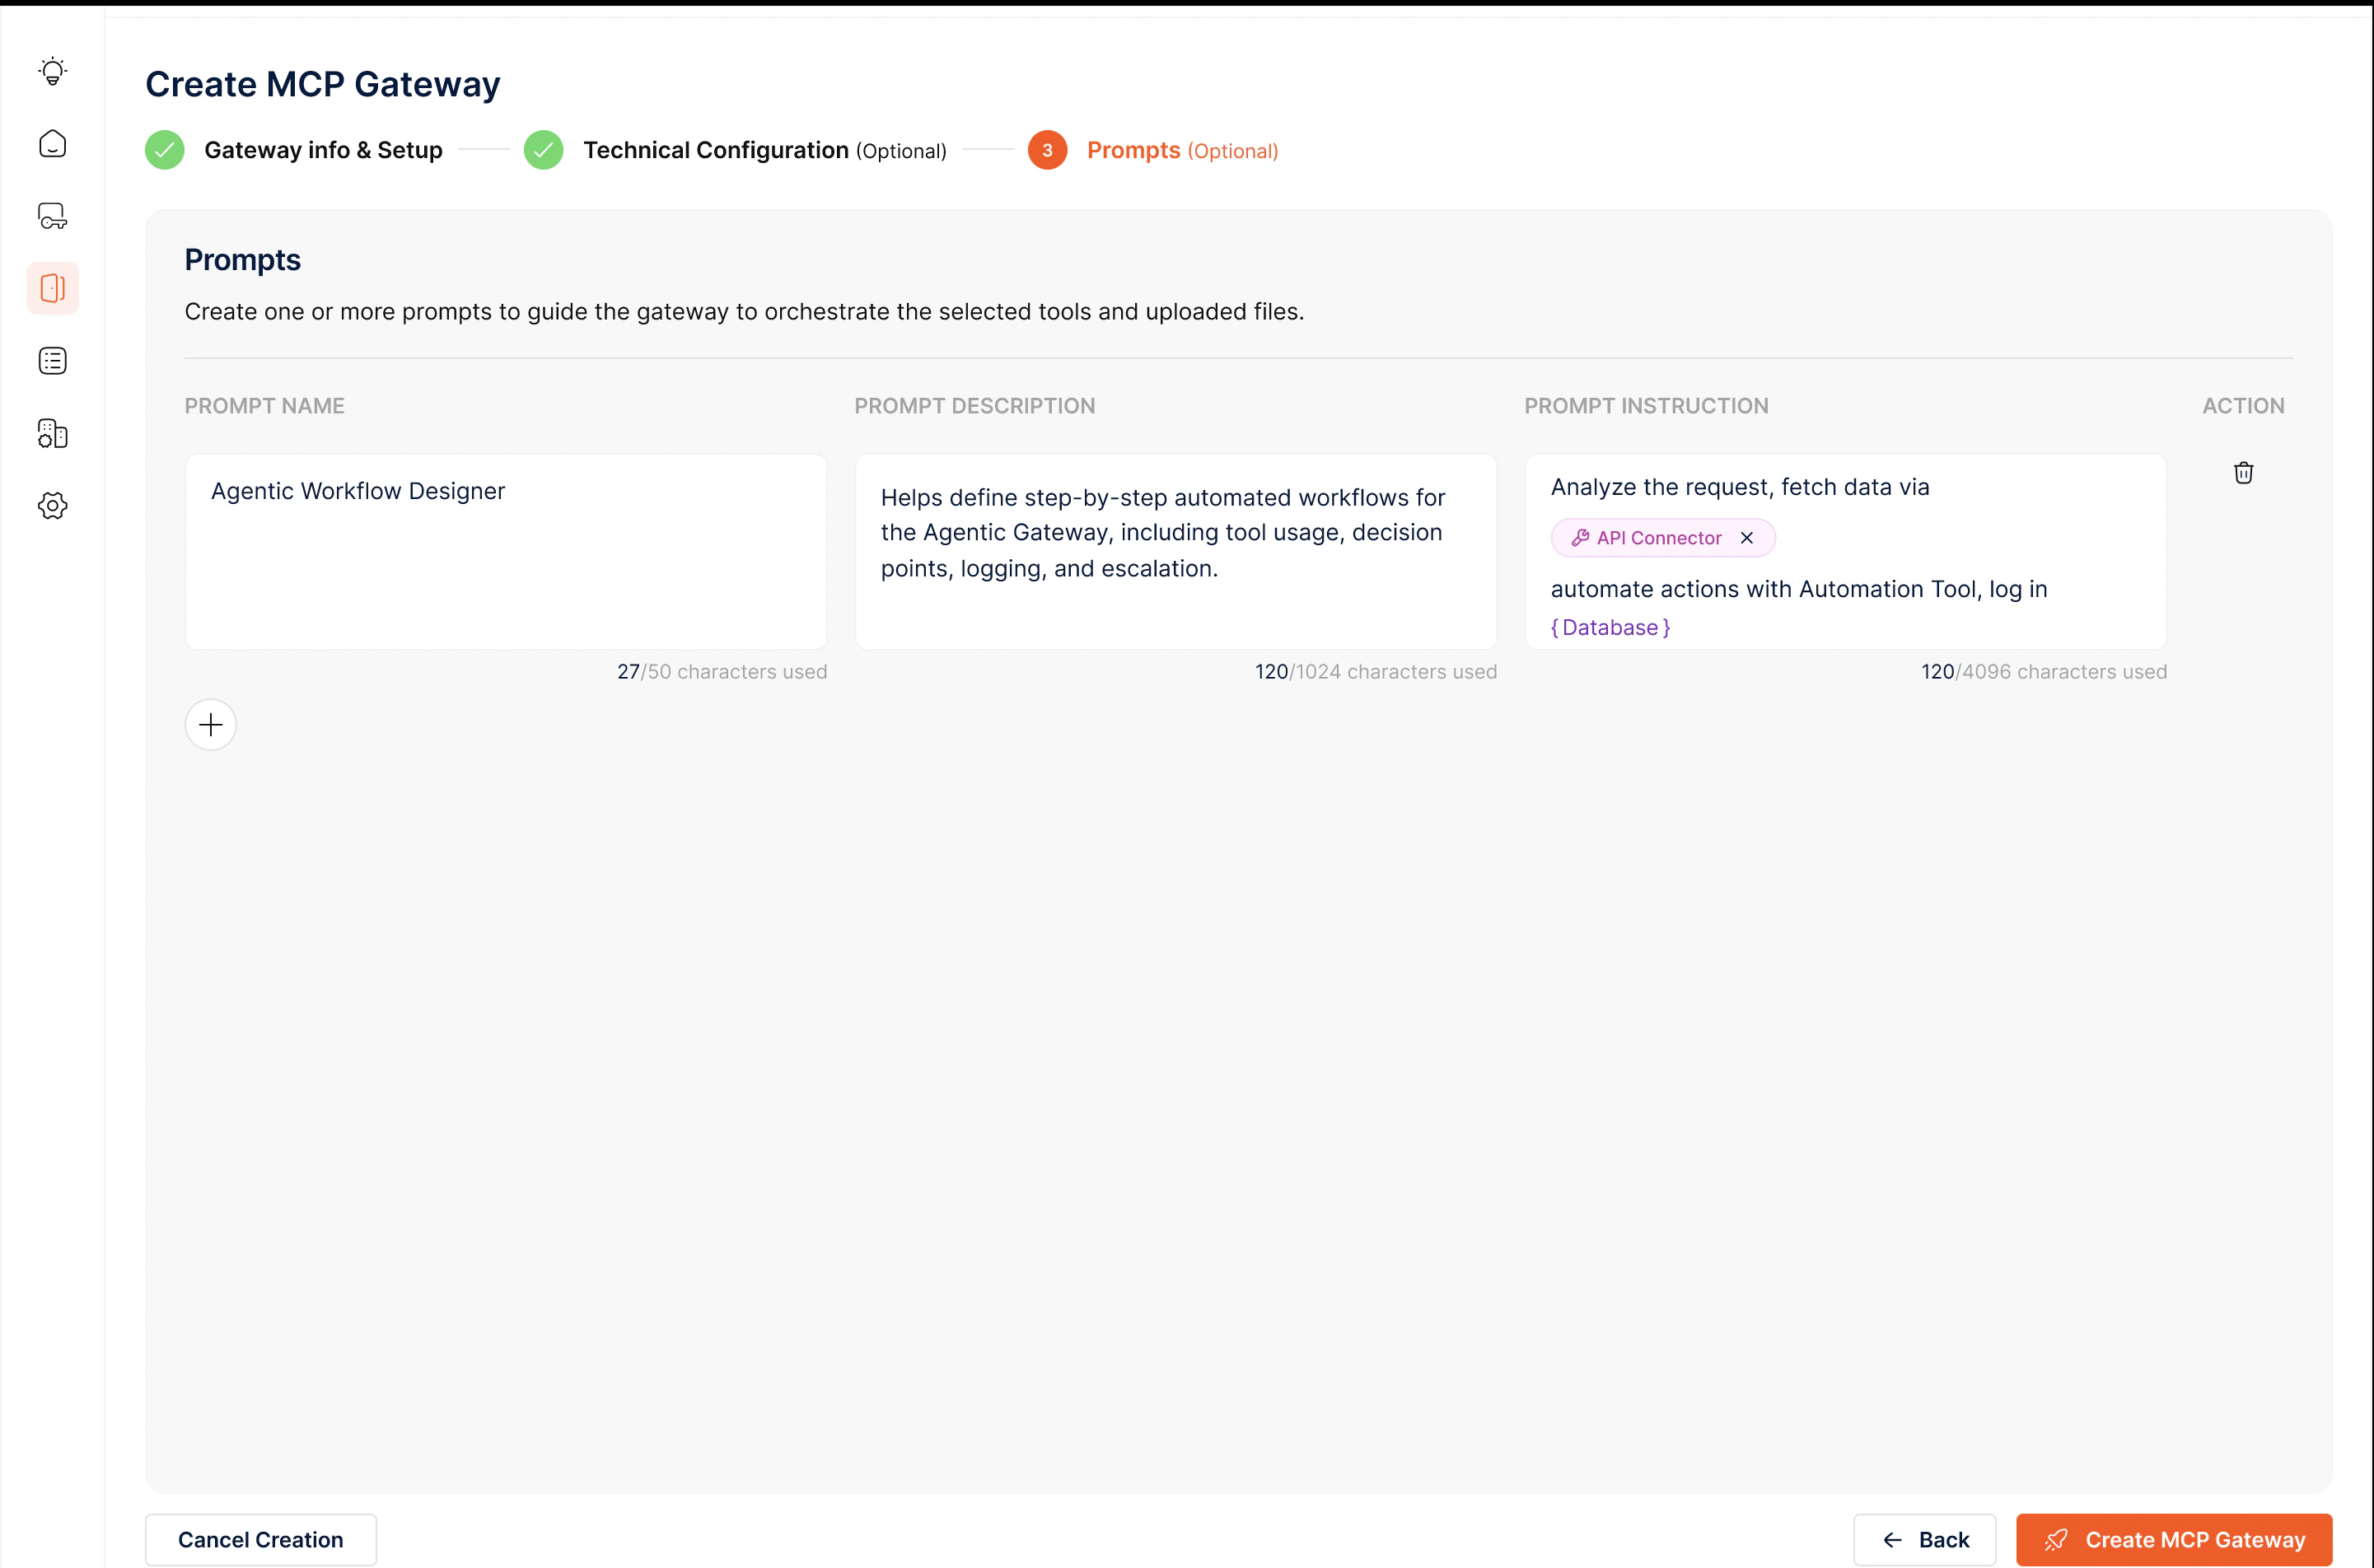
Creating a Gateway Instance
Your Config is a saved blueprint. Create an instance from it to get a live Gateway URL and API key. Point your agent at the URL, pass the API key, and the ToolRouter is ready. Each instance is independent — spin up separate instances for production, staging, and individual customers without duplicating the config. Best Practices- Start broad, tighten later — enable all relevant servers upfront and let usage data guide which to trim.
- Disable destructive tools by default and flip them on only when the use case demands it.
- Use prompts for repeated workflows — if your agent performs the same multi-step task often, encode it as a prompt instead of relying on the LLM to rediscover the sequence each time.
- Reuse a single ToolRouter Config across dev, staging, and production instances rather than duplicating configs per environment.